Showing posts with label Upcycle. Show all posts

DIY Yardstick Box

Monday, July 22, 2013


A few months ago there was a yard sale at the Hutslar house. My parents gave me some stuff to throw in the sale, but when I saw several bright red yardsticks in a pile of their "junk" I immediately snagged them for myself. They were beautiful to me and I knew I could give them new life. 
 
Lately, I've been attempting to brighten up my work space / craft room so I knew I wanted to use them in that space, but wasn't exactly sure how to incorporate them. I actually brought them up from the basement and stared at them for a few minutes just trying to decide what they would be. I realize that is a little cray-cray... welcome to the world of a DIY-er! Eventually (as usual) the light bulb above my head switched from off to on. As a crafter I can never find enough cute ways to organize and display my pretty supplies. I needed to make a cute little box out of these yardsticks! And so it was born...


I am a little smitten with the finished product as you can probably tell by the gazillion pictures I'm sharing! And it was pretty simple to make which I always love! I used a piece of thin board to make the bottom of the box. I used the same piece of board to make the compartment dividers. I had my hubby use his handy-dandy saber saw to cut the pieces of wood. After the wood was cut, I spray painted the pieces to match the yardstick. If you are using a regular wooden yardstick or ruler you could just stain both the wood and yardstick to make them match. Lastly, I used an electric staple gun to assemble the box. I tried using wood glue, but it turned into a total disaster. It was probably an issue with the assembler and not the wood glue, but I just found the staple gun to be 10x faster and easier. I was able to wedge my divider pieces into place and got them to stay in their spots without using the staple gun. To make the staples less obvious I colored over them with a red marker that matched the ruler. And that's it! 
 
PS - I love this yardstick box in my craft room, but it would also make the perfect gift for a teacher or child going back to school! How would you use it?

Hannah

Simple DIY Canvas Art

Monday, July 15, 2013


How was your weekend, my lovelies? Mine was filled with upcycling, crafting, and house remodeling... it was beautiful!


One of the projects I tackled was this canvas makeover. I had the original black and white "Paris" canvas hung in my office a few years ago when I first purchased my home, but had since removed it as my office evolved into more of a workspace / craft room. The black and white theme just wasn't inspiring me anymore. I have been itching to revamp this piece, but just wasn't sure what I wanted to do with it until this weekend. I remembered that I still had quite a bit of the coral colored paint that I had used on my birdhouse makeover (HERE) and realized it would be perfect in our guest room.

First I spray painted the canvas white. After it was dry I just used a brush to paint a few vertical strokes of the coral color onto the plain white. 


It is super simple, but I love that it is something that I created. Handmade is always so much more meaningful, isn't it? It also adds a great pop of color to the room which I love. From start to finish (minus paint drying time) this project took under 5 minutes, but I'm pretty sure I love the result just as much as if it had taken me 5 hours. TOTALLY my kind of craft! Here is the canvas in the room with a little Rhonna Designs iPhone app fun to go with it! Happy Monday, my friends!

Hannah

Painted Birdhouse Makeover

Wednesday, May 22, 2013


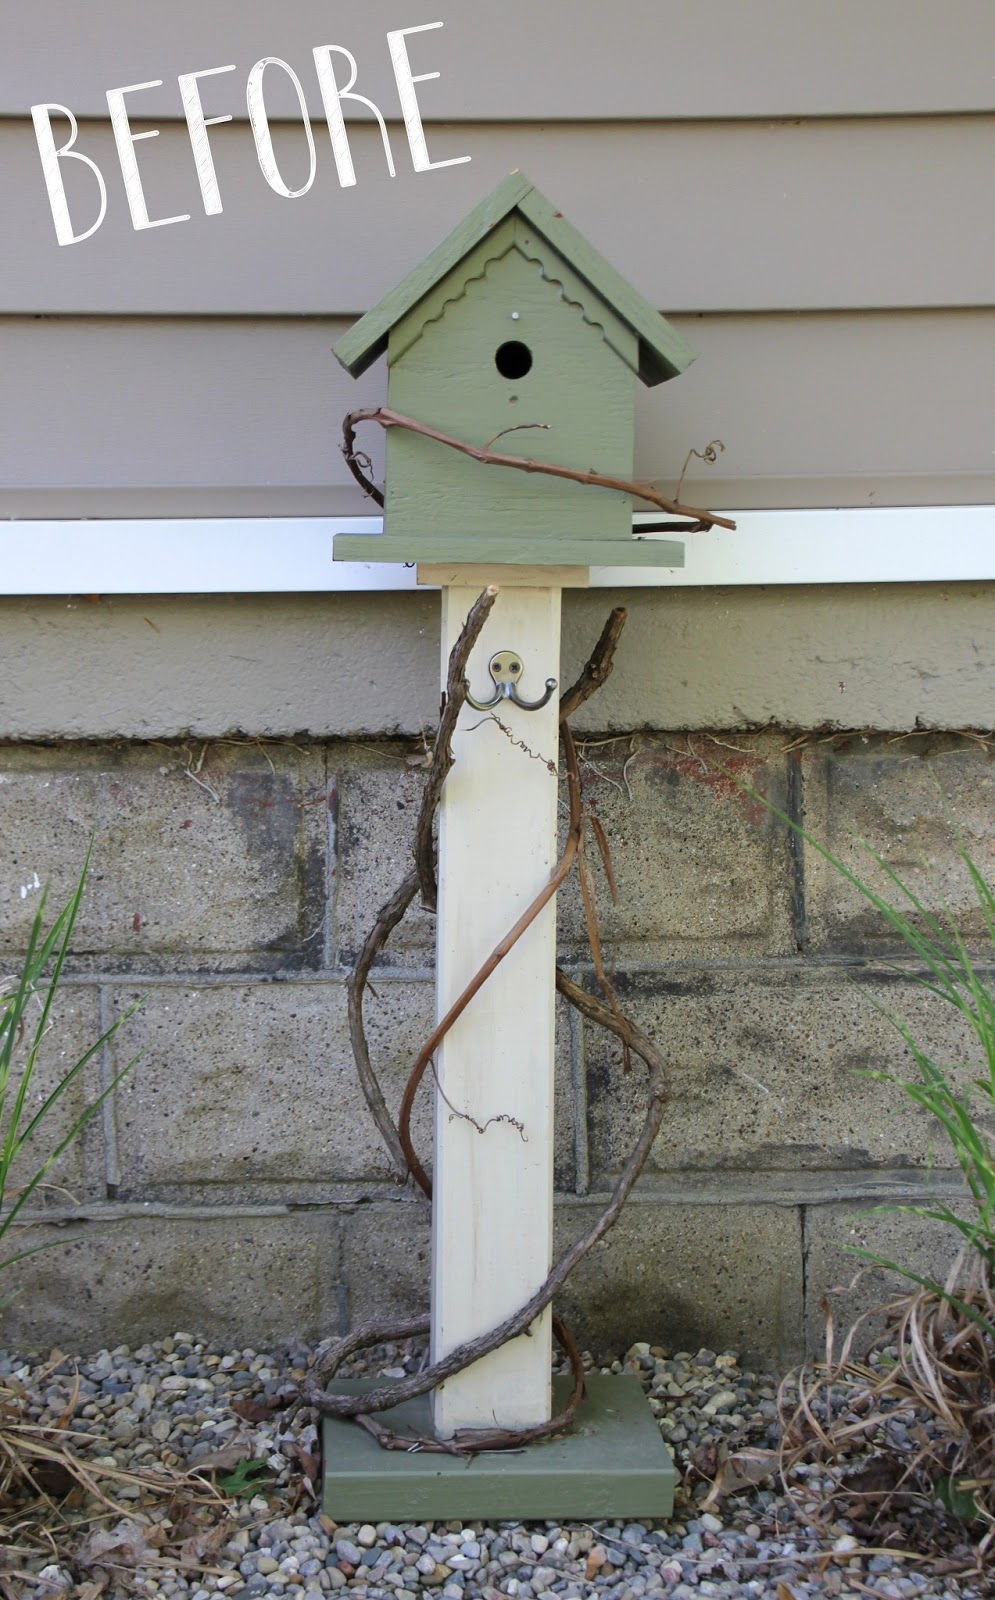
Most of the projects that I do instantly inspire me the moment I see them. I'm a visionary like that. I can literally look at a piece of junk and know how I want to make it new again right away. This birdhouse... not so much. At first I thought it was the color that I didn't like, but maybe it was the vines that were wrapped around the bottom? Regardless, for reasons I can't be sure of, it didn't grab me and beg for a makeover at first like most of my projects do. It was my mom's and when she moved it went in the yard sale pile. As a joke, my father-in-law put it out in front of my house to see if I would notice (I'm a woman, so of course I noticed). I left it there out of pure laziness, but after awhile it started to grow on me and eventually it called my name.

Those of you that subscribe to HGTV Magazine may have noticed the coupons for free Valspar paint from Lowes that have been in the last two issues. When the hubs and I picked up our free paint we chose a bright coral. When we got home from the store... bazinga! It hit me! The birdhouse would be PERFECT in that shade! And the rest is history...


Don't. You. Just. LOVE. It?! I think it's totes adorbs and it was just the color pop that I needed in front of our otherwise neutral home exterior! So thanks, father-in-law. Your attempt to be annoying turned into something I now adore!

Hannah

DIY Chalkboard Menu

Tuesday, May 14, 2013


The moment I saw this wooden frame at Goodwill I knew what I wanted to do with it. It was the perfect chalkboard menu waiting to happen! I'm not sure what it was used for before I snatched it up... it is an odd shape to be a frame so maybe it was some sort of calendar holder. Here is what it looked like when I pulled it out of a pile of other "junky" treasures. 


As you can see it was rough. The backing had a hole in the middle of it so my husband had to cut a new piece of wood for that. We just bought a piece of thin birch wood from Lowe's that only cost about $4.00. The backing was stapled to the frame so to remove it we pulled out the staples with a screwdriver and then used our staple gun to attach the new board. We used chalkboard spray paint on the backing and gave it about 4 coats to make sure my chalkboard was nice and thick. We used regular spray paint on the frame. The hubby chose the avocado green and I love it! I was skeptical at first, but he was right on with that color. 


I love this piece because it's not only great as a menu, but also as a "to do" list, a grocery list, and as a place to write notes to each other. The total cost of this project was around $12. That includes the frame, the board for the backing, the chalkboard paint, and spray paint. My favorite things about this project is that it's an upcycle, it was cheap, and it was super easy to do. It doesn't get better than that!

Hannah

DIY Pretty Shoebox Upcycle

Friday, March 22, 2013


I hate clutter. I don't like to keep anything in my house that doesn't serve a purpose or isn't extremely sentimental. That being said it's kind of a shock to me that I kept these shoeboxes lying around. The crafter in me refrained from tossing them and I'm so glad I did! 

We are currently overhauling what used to be Darren's "fishing room". It is going to a guest room now since all of my family has moved away and we need a place for them to stay when they visit. My Christmas gift from Darren was mostly decor for the room so most of it is done, but there are still a few holes that need to be filled as far as accent pieces go(and on a budget). I have this beautiful scrapbook paper leftover from an album I just finished that matches the room but I couldn't decide how to use it in the room. Then it hit me... Mod Podge it to the shoeboxes!

So here is what I started with... aren't they lovely?

 
Now pay attention because this is really hard. Ok, you all know me better than that. I don't do hard. Alright, I'll be serious... cut the paper into sections that fit each side of the box. You can use good old fashioned scissors or a fancy schmancy paper trimmer like I did. Next slather your Mod Podge over the surface of the box and apply your paper. The Mod Podge dries very quickly so make sure you go section by section. Don't try to do it all at once.
And wa-la! Easy as pie and cute as can be! Now I have pretty boxes for my guest room that cost me $0! LOVE. IT! 


Related Posts Plugin for WordPress, Blogger...

Powered by Blogger · Designed by Pish and Posh Designs